Raw Apple Cider Vinegar
- Sep 12, 2017
- 6 min read

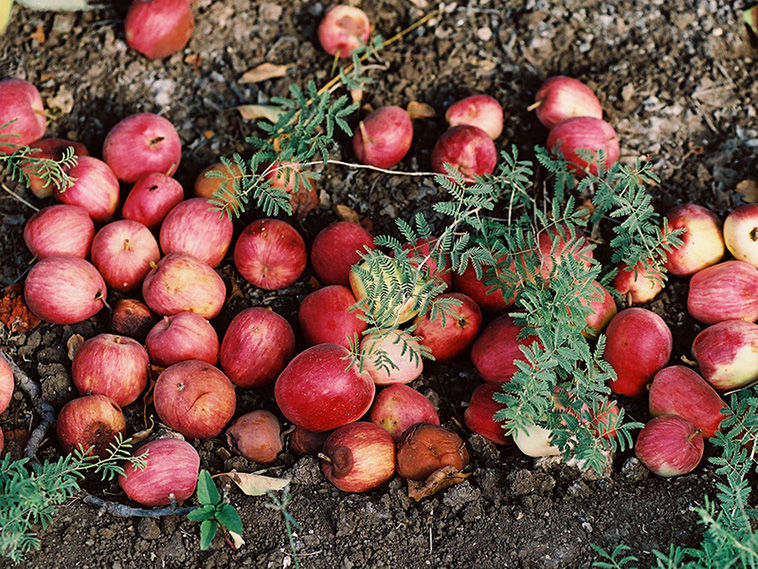
You may have noticed a theme, I like to get the most bang for my buck out of the food we buy. I occasionally make vegetable broth out of the vegetable scraps I save from my weekly vegetable prep. I get several batches of broth from a chicken, or beef. I make seafood broth from my shrimp shells and today, I'll show you how to make apple scrap vinegar from your apple cores and peelings. This is honestly one of my favorite things to make; it amazes me every time. It's just such a magical transformation of apple scraps to vinegar. You can save your organic apple peelings and cores in the freezer until you have enough to fill a quart jar 3/4 with apple scraps, or make our favorite applesauce reserving the cores and peelings from the apples used in the applesauce.
Making broth and vinegar may sound like a lot of work, but it actually takes very little hands on time. I hear lots of people say that it's expensive to eat healthy, but I say, they just aren't doing it right. Buying a lot of packaged, supposedly healthy products and supplements is expensive. Making vegetable, chicken, beef, seafood broth and apple scrap vinegar are all essentially cost free foods made from scraps that are typically thrown away. What's even better, what you make in your kitchen is almost always healthier than what you can buy. It usually tastes better too. While this vinegar is not technically apple "cider" vinegar, because we're starting with apple scraps, as opposed to cider, the end product is very similar. It's also raw, unfiltered, organic, contains the mother and a wonderful array of beneficial elements. Best of all, it's free!

Raw Apple Scrap Vinegar
Cores and peelings from organic apples
1 Tbsp. organic, raw apple cider vinegar with mother, per cup of water
1 Tbsp. organic, pure maple syrup, per cup of water
Non-chlorinated, non-fluoridated water
Quart Jar

1. Fill a wide mouthed quart glass jar 3/4 full with apple scraps.
2. Add enough water, vinegar and maple syrup mixture to cover the apple scraps. A quart jar 3/4 full with apple scraps will take approximately 2 cups of water to cover the scraps. So mix 2 Tbsp. vinegar and 2 Tbsp. maple syrup with 2 cups of water and pour over apple scraps. You will want to leave about an inch of headspace. I typically fill with the vinegar/water/syrup solution to the bottom ring on the jar; where the neck begins.
3. Cover the jar with a coffee filter, or cloth. Fruit flies love this stuff! Secure the coffee filter or cloth with a canning jar ring, or a rubber band to keep them out.
4. Give the top of the jar a little stir once a day and push the apple scraps under the liquid. They'll float back up; that's ok. Pushing them down once a day will be enough to discourage mold growth. The top will get frothy, especially when the scraps are pushed down and that's ok too. It's a sign that the good bacteria are at work!
5. Leave the jar of fermenting apple scraps on the counter at room temperature and out of direct sunlight, for 2 weeks, or until the scraps stop floating and the frothing action subsides. You may have a stray floater, but when the majority of scraps sink to the bottom of the jar, around the 2 week mark and the frothing has diminished, you're ready to go on to the next step.
6. Place a container under a colander and strain the liquid from the apple scraps. If you have a compost, toss the scraps in that; waste not, want not!
7. Pour the liquid back into the jar. Continue to ferment the strained liquid, covered with a coffee filter, or cloth as before, for approximately 4 weeks, or until it has an unmistakable tart vinegar taste, and no alcohol undertones (flavor). Do not stir, or agitate the fermenting liquid during this time. This could take up to 6 weeks in the winter and may even go a little faster than 4 weeks in the summer, but 4 weeks is a good average amount of time for this step. See FAQ below.
8. Use a funnel to pour the finished vinegar, into an airtight container with a small opening. While fermentation took place in an aerobic environment, less air is preferable at this stage, as excess air can begin to dilute the acidity of the vinegar. A small opening will expose the vinegar to less oxygen as there is a smaller surface area. Remember to recap your vinegar after each use, to ensure it's longevity and quality.

FAQ
Fermentation takes a bit less time in the warmer temperatures of the summer, than in the winter. It will also vary, according to the temperature of the room it's being fermented in.
The chemicals on conventional apples can kill the beneficial bacteria needed to produce a home produced vinegar. Because of that, I recommend starting with organic apples.
Vinegar is an aerobic type of fermentation. The acetobacter bacteria that's responsible for creating vinegar requires adequate oxygen to do it's job. This is why you should not cover the jar with a lid, as with anaerobic types of fermentation.
Vinegar is also an acetic type of fermentation. Making vinegar is a two step fermentation process which changes carbohydrates to alcohol and then to acetic acid which is what your vinegar is made up of.
A gelatinous film, or layer may develop on top of the vinegar, generally after the apple scraps are strained away from the liquid, this is called a vinegar mother. If an obvious mother does not develop on top of your vinegar, not to worry! It does not mean that a mother is not present in the vinegar. A vinegar mother can be manifest in several different ways, it's often a less noticeable web-like, or thin stringy film that can be found at the bottom of the vinegar.
When the vinegar is done, remove the mother, if there is an obvious one that is easily removed. Add it to a new batch of apple scraps, or store it in a separate container covered in a small amount of vinegar, or discard. You may store your mother in your vinegar, for shorter periods of time, but if you are aging it, or will be storing for an extended period, I recommend storing it separately.
When making a new batch of vinegar, you may use vinegar from a previous batch of apple scrap vinegar as a starter.
If you have a well developed mother, it can be used in place of the vinegar as a starter for your next batch. Place the vinegar mother in the bottom of the jar before filling with apple scraps. If the mother is not well developed, go ahead and use it in combination with previously made raw vinegar as a starter.
Since this is a home produced vinegar, it's perfectly acceptable to use your sense of smell and taste to determine when it's done. You'll know it's done when it tastes distinctly tart: like vinegar, as well as the absence of any alcohol undertones in taste.
Your home produced vinegar may be a bit less acidic than store bought, and it's acidity can vary from batch to batch. Keep this in mind when using it in recipes. You may need to add a bit more to get the same level of acidity.
Vinegar must have a 4.5% acetic acidity to be safe for canning. Home produced vinegar is not recommended for this purpose, unless a titration kit (acidity strips are not accurate in testing vinegar) is used to test acetic levels. In addition, the acidity can change over time.
Once the alcohol has converted to vinegar, the acetobacters will break down the vinegar into carbon dioxide and water, in the presence of oxygen. This will dilute the acidity in your vinegar. For this reason, once your vinegar is finished, you'll need to store it in an airtight glass container. It's also best to store the vinegar in a container with a small opening, as the vinegar will be exposed to less oxygen due to a smaller surface area. For the same reason, it's best to store the vinegar in a container filled to the top. Storage containers are not as important if you'll be using the vinegar in the near future, but if it will be stored for a longer period of time, like in the next step, you'll want to pay closer attention to it.
I usually begin to use my vinegar right away. But for a more developed flavor, you can age your vinegar. Simply store the vinegar in a container as described above, out of the light and at room temperature for several months; 6 months is ideal.
Please see this post for ways to use raw apple cider vinegar.
Comments